I have been thinking about journaling a lot lately. Many scrapbooker struggle with this part of the process. We all get so inspired by the papers and products out there in the stores but often get stuck on what to say about the subject of our layout. I hope this post gives you a little inspiration when you get stuck.

Here is a layout I designed for ScrapbooksPlus using the June Design Team kit. The journaling for this layout is a bit more personal and I prefer to use hidden journaling on pages like that. The library book pocket on the right side of the layout is where I hid my journaling.


When I was done journaling that sweet hand written letter to my son about his first day of preschool I folded it up and put it in the pocket and then I journaled again. Yep! That's right... you can journal more than once on a layout. It worked especially well for this layout since the main journaling is hidden. The casual observer does not have to read the hidden journaling. She can just read the quote on the upper left hand corner instead and get the idea of what this layout is about.

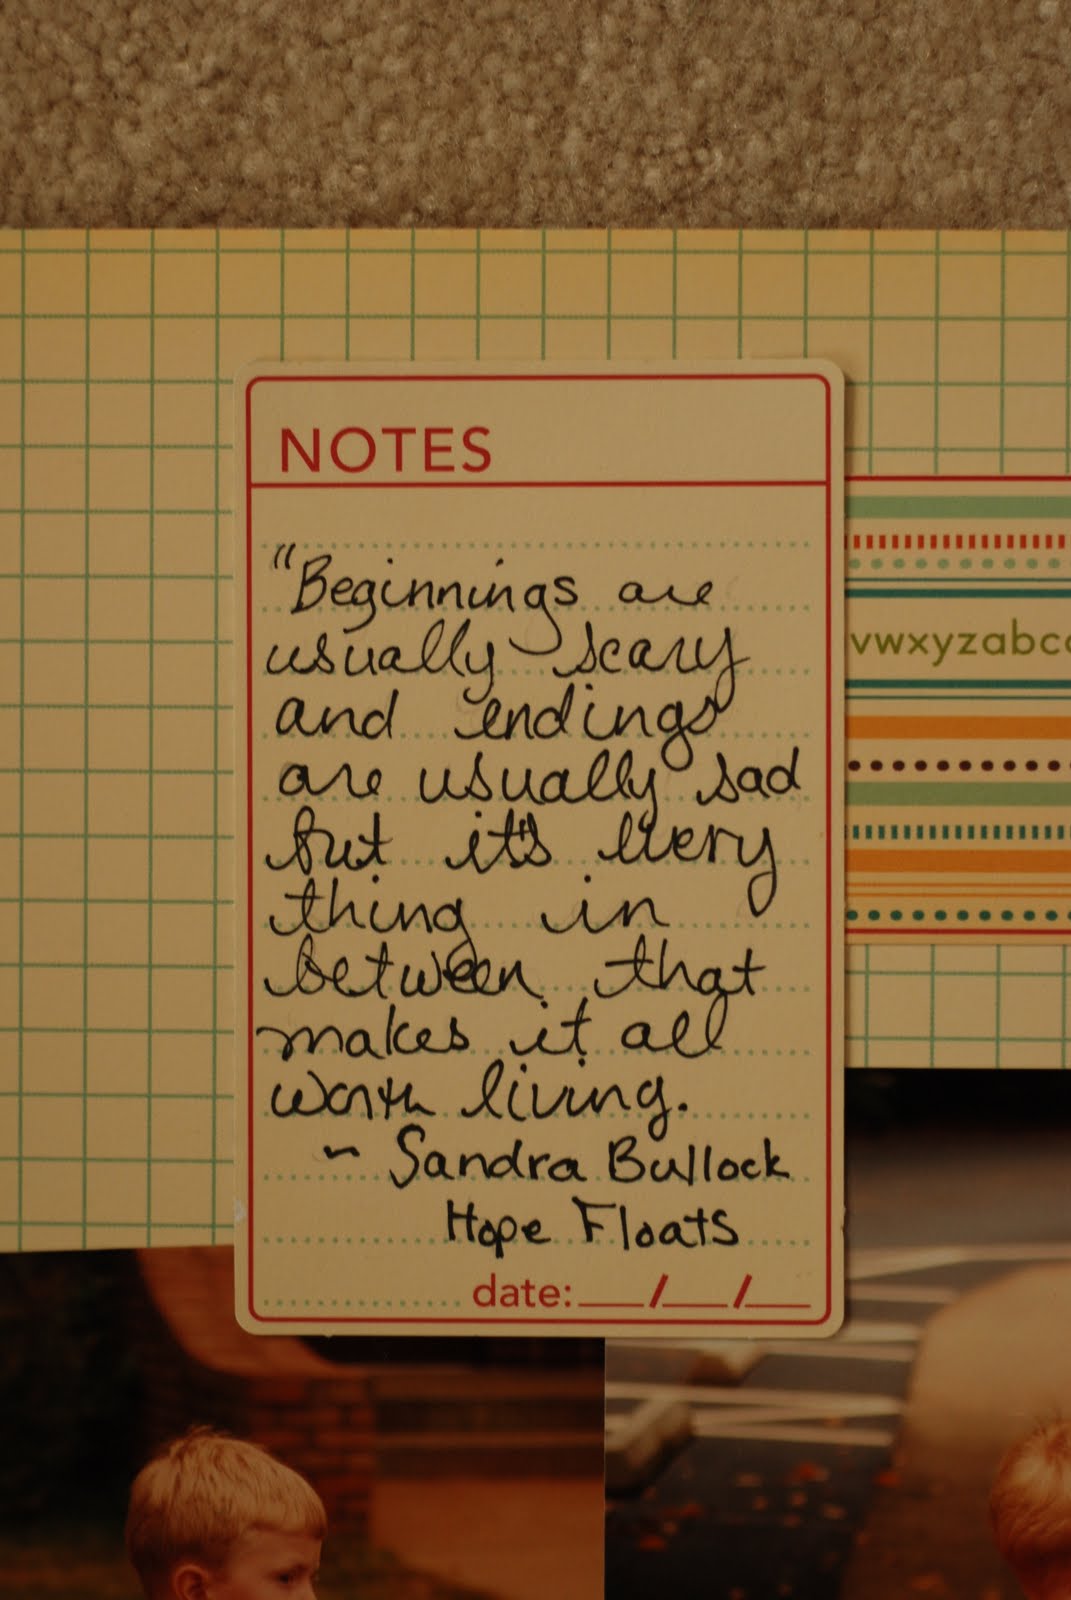
Quotes are a great way to journal when you can't find just the right words. Often times you'll find that someone else did find just the right words to describe what you are trying to say. So the quote I used is one of my favorite quotes. It is from the movie Hope Floats. At the end of the movie Sandra Bullocks character says "Beginnings are usually scary and ending are usually sad but its everything in between that makes it all worth living."
So where do I find the best quotes for scrapbooking? This one came from one of my favorite movies. I watched it repeatedly in my early 20's. I practically had it memorized so when I was journaling about this day it just popped in my head. There are also some good websites with quotes especially for scrapbooking. Click
here for one of my favorites. The quotes are divided into themes so you can easily find something that works for your layout. I also keep a notebook of quotes and whenever I hear a great quote I right it down. I picked one from my quote journal to share. I once watched an interview with Rev Joseph "Run" Simmons and he said "
I really thought that the hard part would be in raising you, but the real hard part is letting you go." I slipped that great quote right in my quote journal and now I'll be ready when my 7 year old goes off to college... or at least I'll be ready to scrapbook it. The best part about my quote journal is that the quotes in it are all word that moved me, made me feel something. Every time I read through a few of the pages in it I get inspired.
I hope this has inspired you to journal on you layouts. After all a picture may be worth 1000 words but which words? No one will know unless you write them down.


 ate with four different flowers, two of each different flower. I made them all in different sizes ranging from 3 3/4 inches to 1 1/2 inches in diameter. Once they were cut out I spread them out on my craft mat and sprayed them with water then crumpled them. I unfolded them and laid them out on my craft mat to let them begin to dry. I hit them with my heat gun until they were crisp and the wonderful texture from the folds was set into each flower. I stacked them and put a brad through the center to hold them together. This flower so easy and inexpensive to make {well, besides the cost of the Silhouette of coarse} and it was the perfect embellishment for this page. I saved the template on ROBO Master and plan to make another one of these little beauties soon. This time I think I'll use a couple different patterned papers and see how it turns out. If you want to know how to use different papers on the same die cut pattern on the Silhouette check out my blog post SUMMER.